The Leanbase automation streamlines workflows by automating repetitive tasks and ensuring consistency in your projects. With automation, you can define triggers, conditions, and actions to simplify processes. Users can create automations for specific tasks or set up rules that apply to an entire board to boost efficiency and productivity.
Automation is based on three components:
Triggers: Events like the creation of tasks, status changes, or upcoming due dates that kick off the automation.
Conditions: Filters like specific labels or high priority that define when the automation applies.
Actions: Automated tasks like assigning team members, sending notifications, or updating statuses.
Create Automation
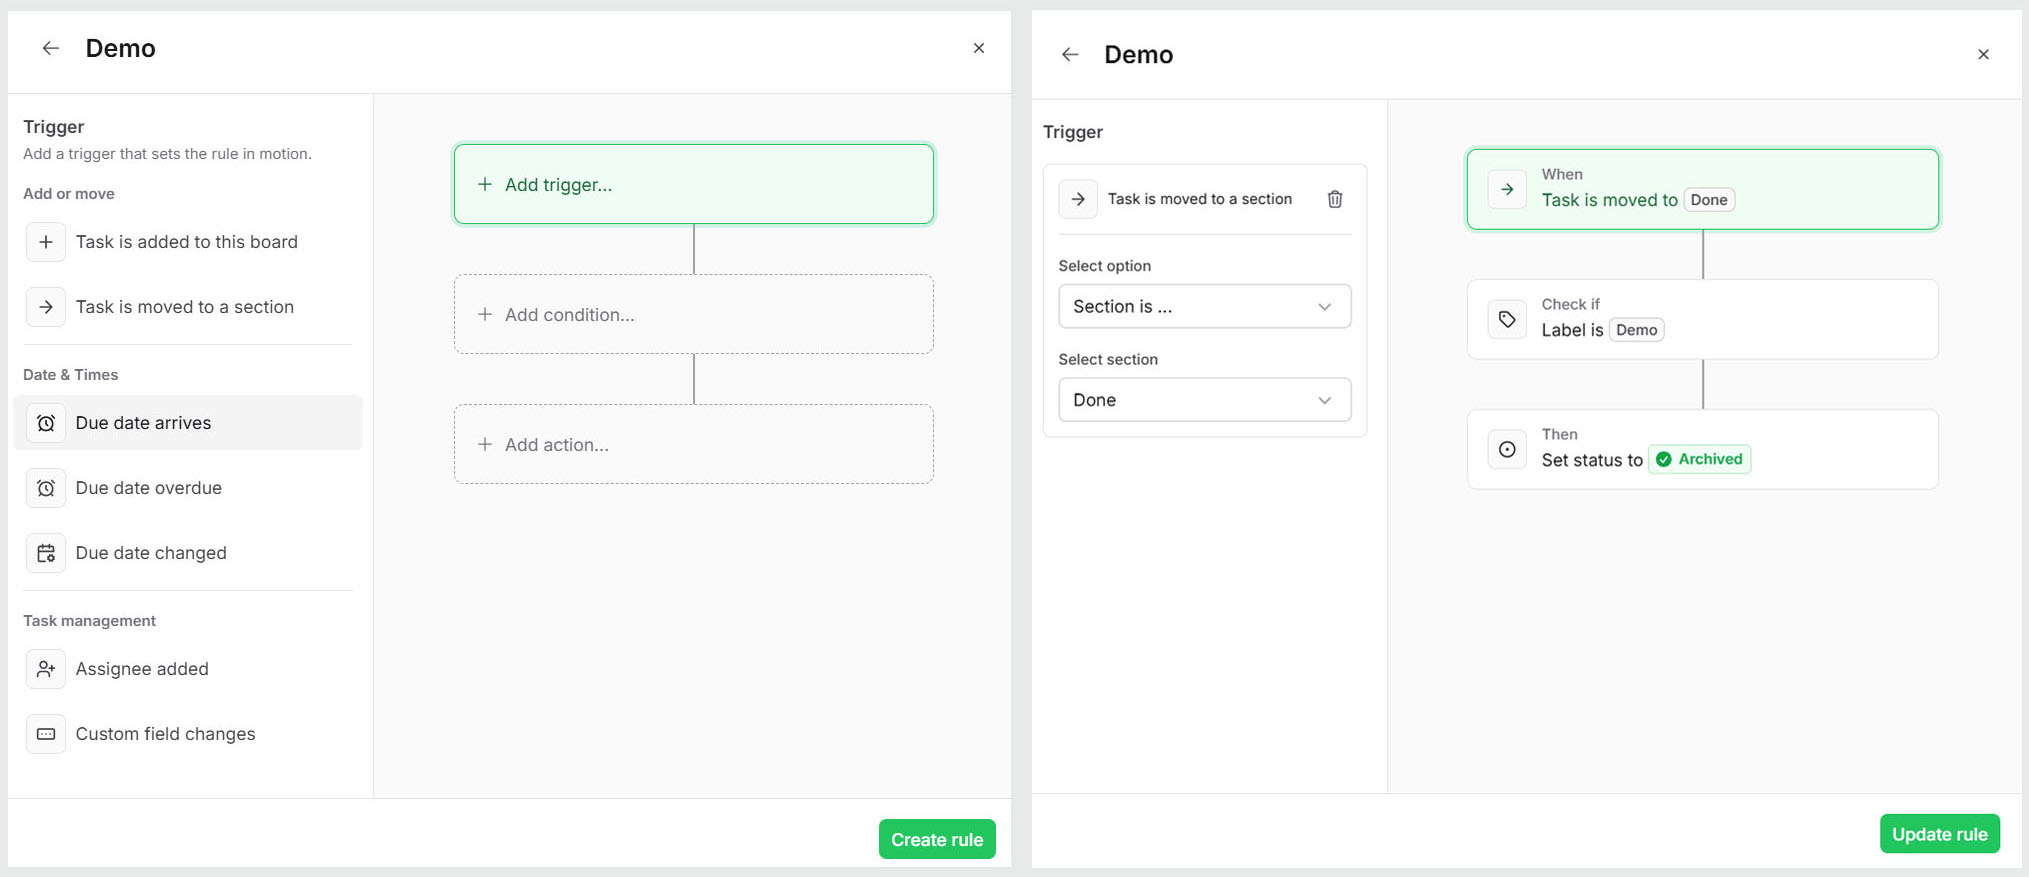
Follow these steps to set up automation:
Navigate to the board settings for the desired board.
Select the automation section and then go to the rule tab.
Click on Create Rule.
-
Configure the automation by specifying the following:
Add trigger: Select an event like “Task is moved to Done”.
Add condition: Add filters like “Label is Demo”.
Add action: Define the outcome like “Set status to Archived”.
Save the automation, and it will apply to all relevant tasks within the board.
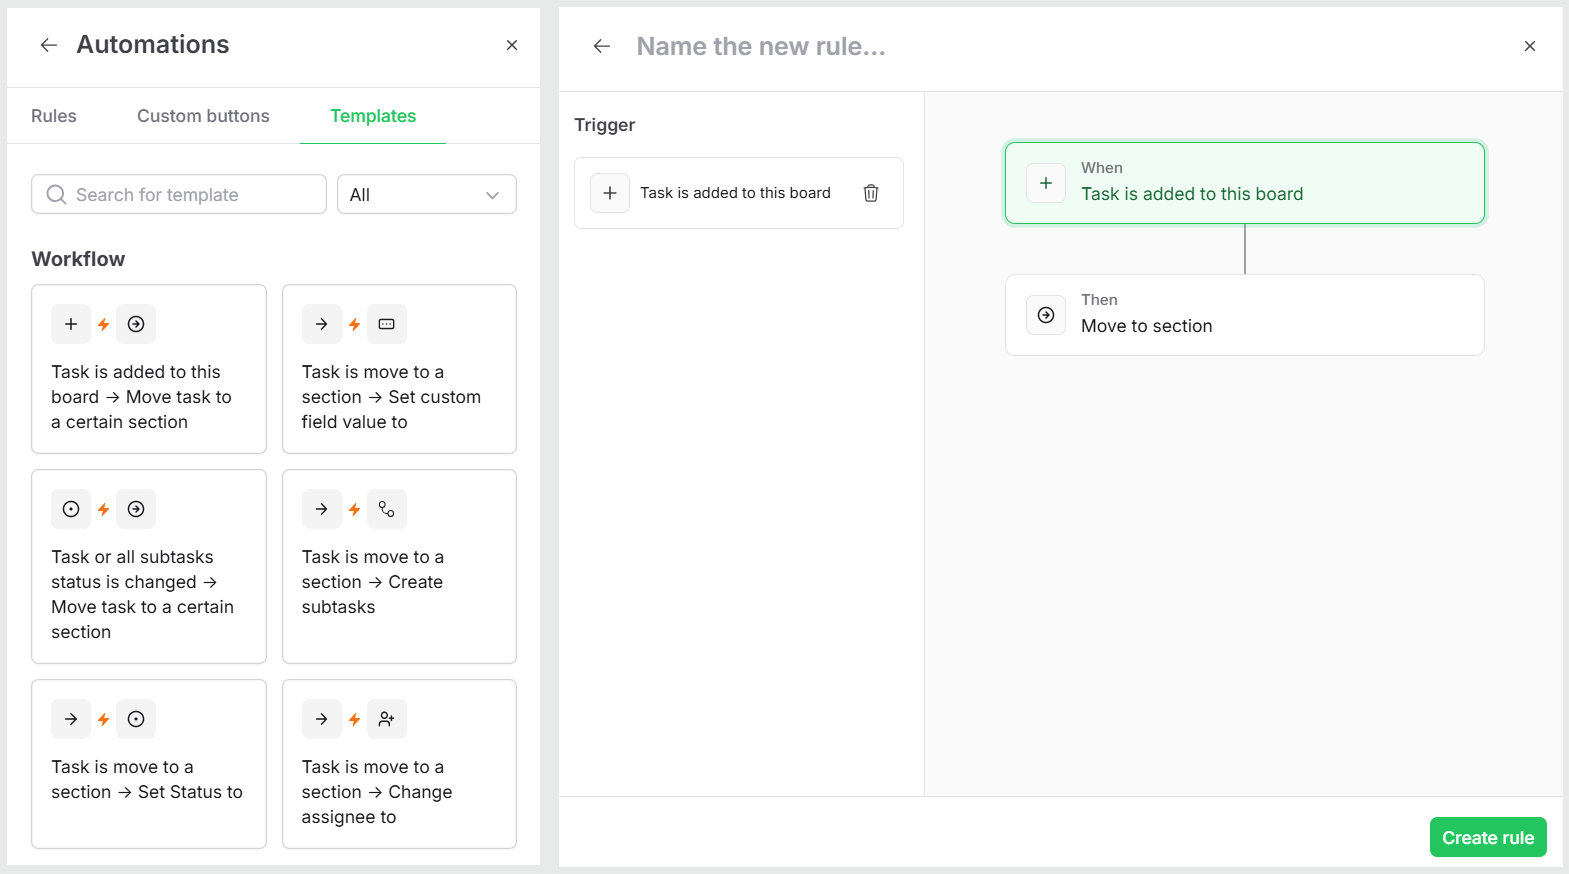
Create Automation from Template
Leanbase offers pre-made templates to make creating automations easier:
Go to the tab Automation under Board Settings.
Click on Templates.
-
Browse the template library with examples like:
Task is added to this board → Move task to a specific section.
Task is moved to a section → Set custom field value.
Task is moved to a section → Set status.
Select a template and adjust the trigger, condition, or action as needed.
Save the automation to activate it immediately.
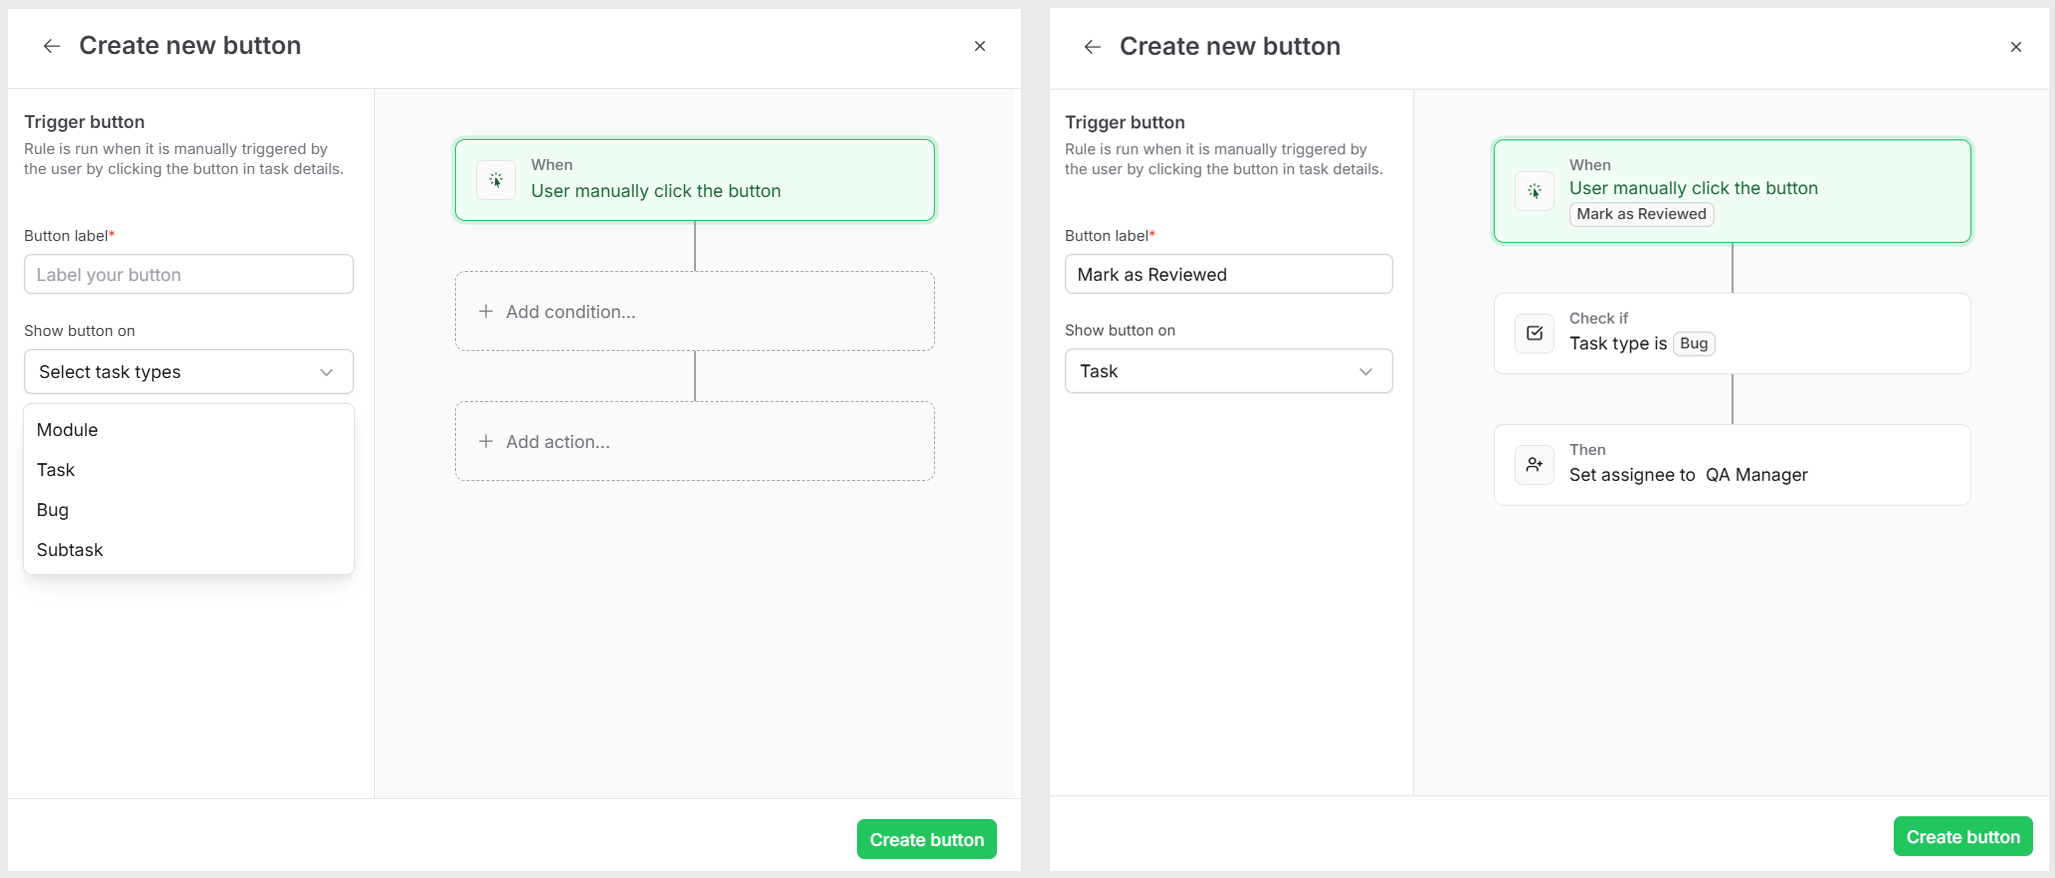
Create button automation
Button automation allows users to manually trigger predefined actions for a task. This button is shown in the task details:
Go to the Automation tab in Board Settings. Then navigate to the Custom Buttons tab.
Click on Create Button.
-
Define the automation parameters:
Button label: Provide a clear name (e.g., “Mark as Reviewed”).
Display button on: Choose where the button will appear (e.g., module, task, subtask, etc.).
Add condition: Define all conditions that must be met for the button to work.
-
Add action: Specify what happens when the button is clicked, such as:
Change the task status to “In Review”.
Assign the task to the “QA Manager”.
Save the button. A clickable button will now appear in the task details.