Import from Clickup to Leanbase
Switching to Leanbase? Great choice! This quick guide will walk you through the essential steps to migrate seamlessly to Leanbase.
In this guide, you'll find:
Key differences between Leanbase and ClickUp
How to seamlessly migrate your ClickUp data to Leanbase
How Leanbase different from ClickUp
-
Status and Section: Leanbase uses both status and section, while ClickUp only uses status to display task statuses and store tasks position.
-
Status in Leanbase:
In Leanbase, users have three main status categories: Not Started, In Progress, and Done. They can add new statuses within these categories, specific to each board.
To reuse a custom status set, users must save it as a Settings Pack.
-
Section in Leanbase:
Users can create unlimited sections, or called status in ClickUp in which each capable of storing tasks with different statuses.
To streamline workflows, users can assign a specific status to a section. When a status is set for a section, all tasks with that status will automatically be organized into that section.
-
-
Task level:
Leanbase offers three task levels: Module → Task → Subtask, with Module being the highest level, representing an epic, milestone, or feature.
In contrast, ClickUp has two levels: Task and Subtask. Additionally, ClickUp allows users to mark tasks as milestones to flag events like launches or key deliverables.
-
Custom field:
In Leanbase, custom fields are linked to task types, with each task type having its own set of custom fields. To reuse a task type and its custom fields, users can save them as a Setting Pack. Custom fields can also be reused across the entire workspace.
In ClickUp, custom fields apply to all tasks on a board and are not restricted to specific task types.
Settings pack add-on features: A Leanbase Setting Pack includes Task Types with Custom Fields, Automations, Labels, and Statuses. Users can create, assign, or unassign Setting Packs to different boards, enabling them to reuse board configurations and streamline workflows across the entire workspace.
How to Import from ClickUp into Leanbase
How to Export a ClickUp Board as a CSV File
Go to the Workspace or List: Open the Space, Folder, or List in ClickUp containing the tasks you want to export.
Open the Options Menu: In the top-right corner of the page, click on the Customize icon next to the Add task button. Make sure you are on the List view to select the customize button.
Select Export to customize CSV export settings: From the dropdown menu, choose Export view > CSV.
Download the CSV File
Try the Leanbase Import Tool
Leanbase offers a new, streamlined tool for importing data from ClickUp boards into Leanbase quickly
Click the hamburger menu icon located on the right-hand side of the screen to open board settings
Select import tasks button
In the Import tasks section, drag the CSV file you wanted to import or click the Select CSV file to import
Upload the ClickUp CSV file
Important note:
Step 1: Move all members to Leanbase boards
Before importing, ensure all users from your old boards are added to Leanbase to prevent tasks from being unassigned.
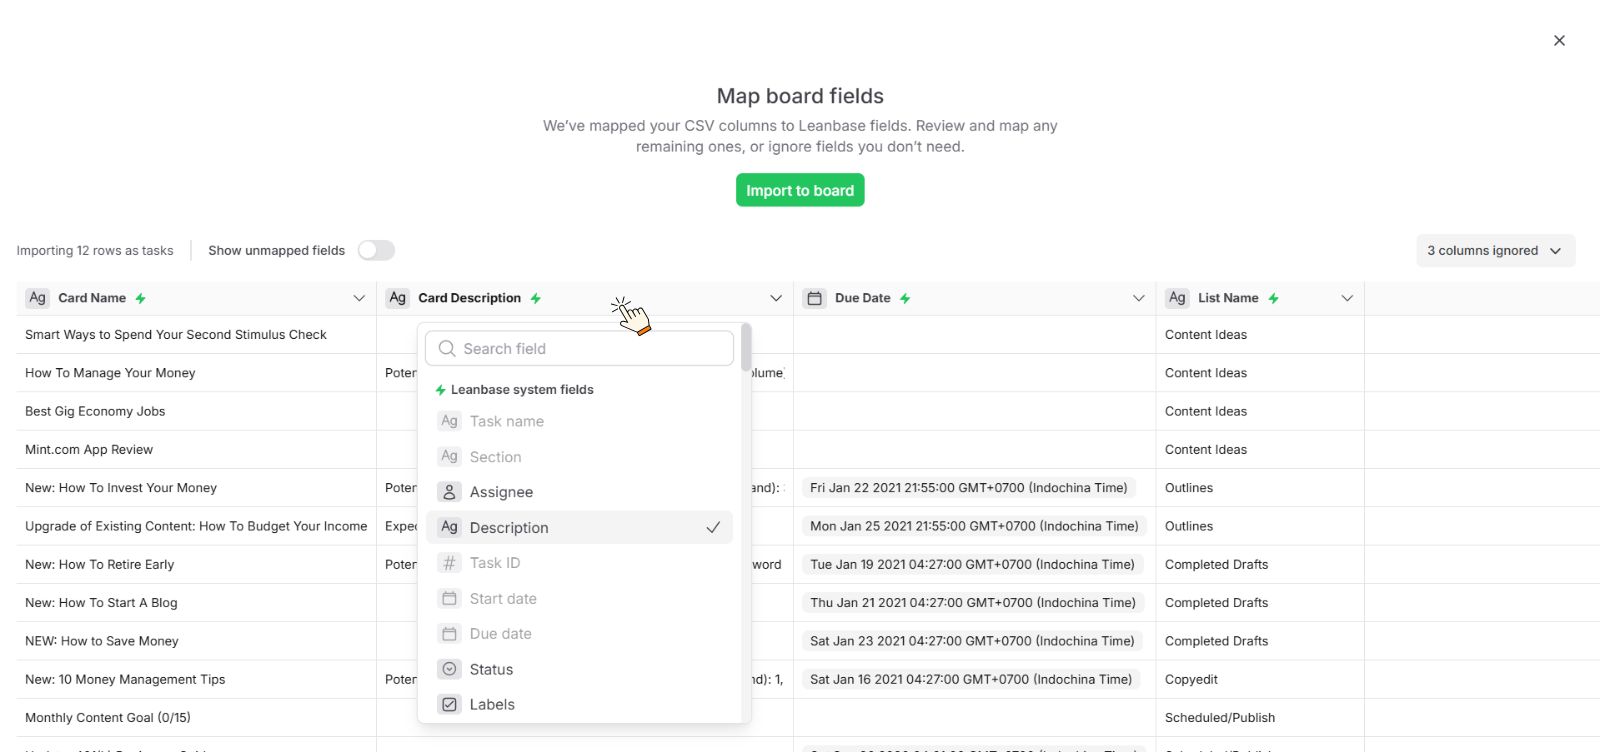
Step 2: Map ClickUp Boards to Leanbase Boards
Automatic Field Mapping:
Leanbase automatically detects ClickUp fields and matches them with corresponding Leanbase fields. Users can click on each row to review and adjust these mappings as needed.
Field Customization Options:
Select a Leanbase system field as the default for tasks or other Leanbase fields.
Search for existing fields in your workspace or create a new custom field to match.
Choose to ignore fields that are not relevant.
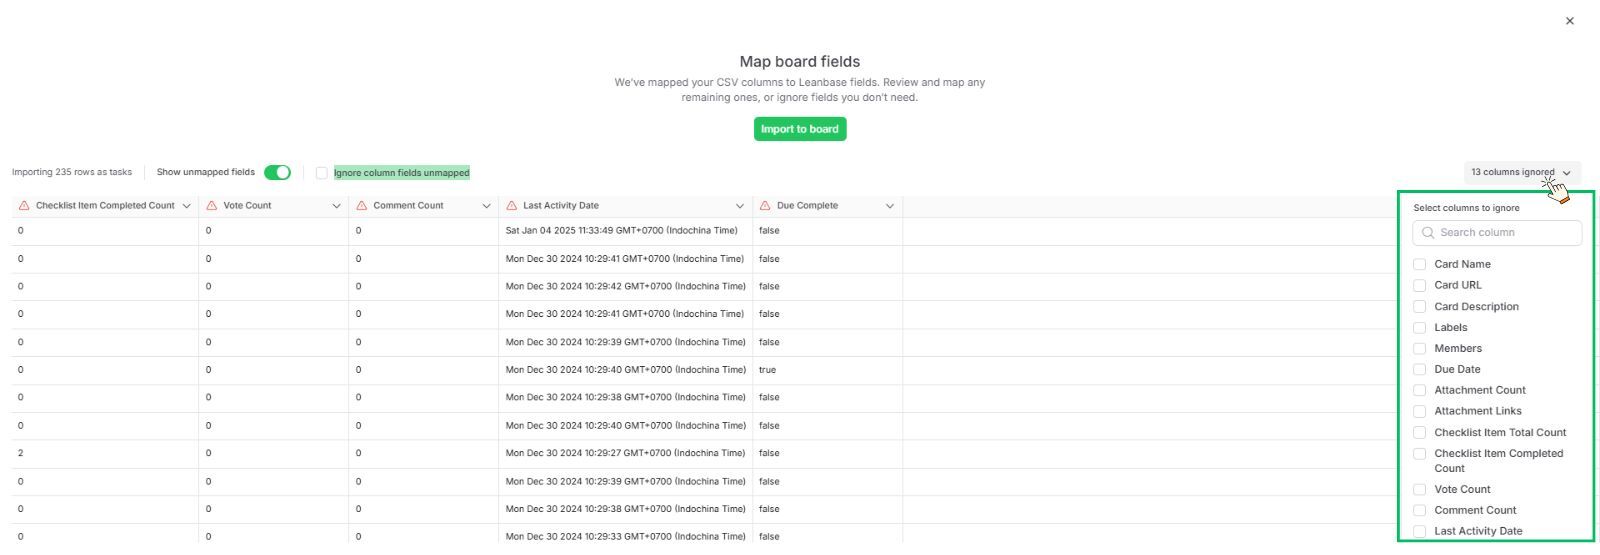
Pro Tip:
Enable Show Unmapped Fields to display only unmatched fields for easier review.
Use the Ignore column fields unmapped button to skip unnecessary fields and speed up the import process, avoiding time spent on irrelevant data.
-
Users should double-check the data mapping to ensure the correct information is imported accurately.
ClickUp
Clickup standard field
Leanbase system field
Task Name
Task name
Status
Section
Assignee
Assignee
Task Content
Description
Due date
Due date
Tags
Labels
Attachments
Attachments
Comment
Comment
Task
Task
ClickUp customfield field
Leanbase custom field
Dropdown
Dropdown
Text area
Text field
Text
Text field
Date
Date field
Checkbox
Check box
Number
Number field
Field Ignore Management:
Leanbase allows you to manage ignored fields during the import process effectively, user can select Show more button to unhide those ignored fields:
Ignore Specific Fields: Select individual fields that you don’t want to import and mark them as ignored.
Ignore All Fields: Quickly bypass all unmatched or irrelevant fields using the Ignore All Fields option on Unmapped Fields
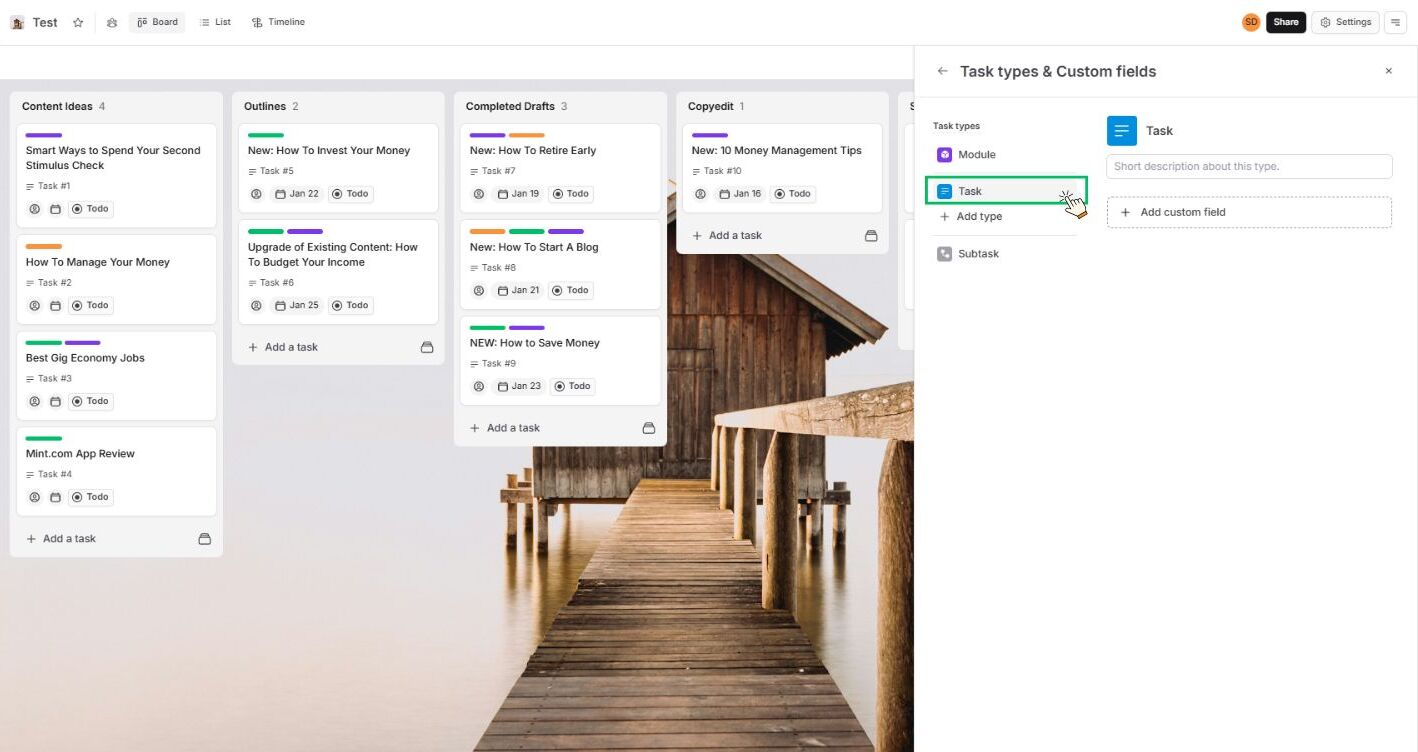
Post-Import Task Management
-
Default Task Type Assignment:
After importing, all ClickUp tasks will automatically use the first task type in the Leanbase board settings (commonly named "Task").
-
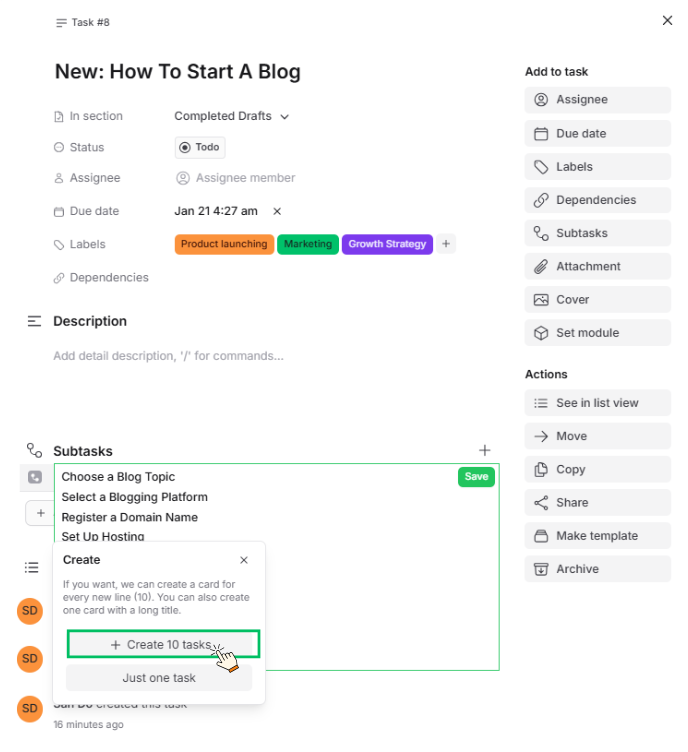
Subtasks missing handling:
ClickUp subtasks will not be imported.
-
To recreate them:
Navigate to the target task.
Copy and paste the checklist items manually into the task.
Select create multiple tasks
Alternatively, you can create new field in text field type for Subtask’s URL field to store the links to the subtasks. Click the link to navigate directly to the task in ClickUp.
Important Notes
There are some data in ClickUp will not imported
Archived Cards: Tasks archived in ClickUp will not be imported.
Archived Lists: Archived section and their cards will not be imported.
Subtasks: ClickUp subtasks will not be imported.
Protip: You can create new field in text field type for Subtask’s URL field to store the links to the subtasks.