A Board in LeanBase is a visual workspace for organizing, assigning, and tracking tasks within a project. It can be customized, shared, or kept private to suit your team's needs. This guide explains how to create and manage boards efficiently.
Leanbase boards help structure work by:
Organizing tasks with customizable columns, various view
Enabling real-time team collaboration.
Enhancing workflows with templates, automations, and labels.
Tailor own needs by structuring various task types level
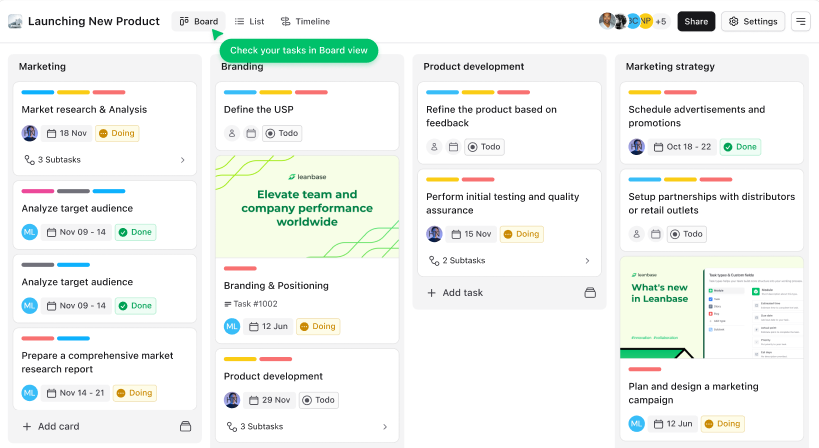
Kanban view
The Kanban View in Leanbase visually organizes tasks into sections and statuses, displayed as movable cards. It helps teams track progress, prioritize tasks, and streamline workflows effectively.
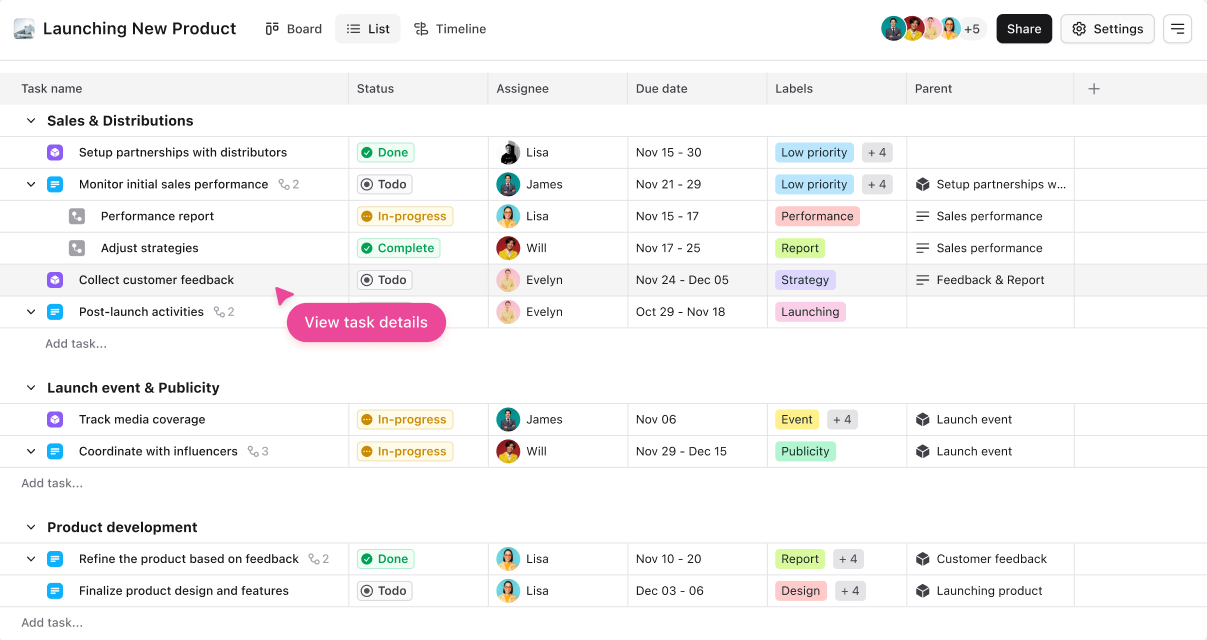
List view
The List View in Leanbase displays tasks in a table format with details like status, assignee, and due dates. Users can group tasks by module or section for a customized, data-driven overview.
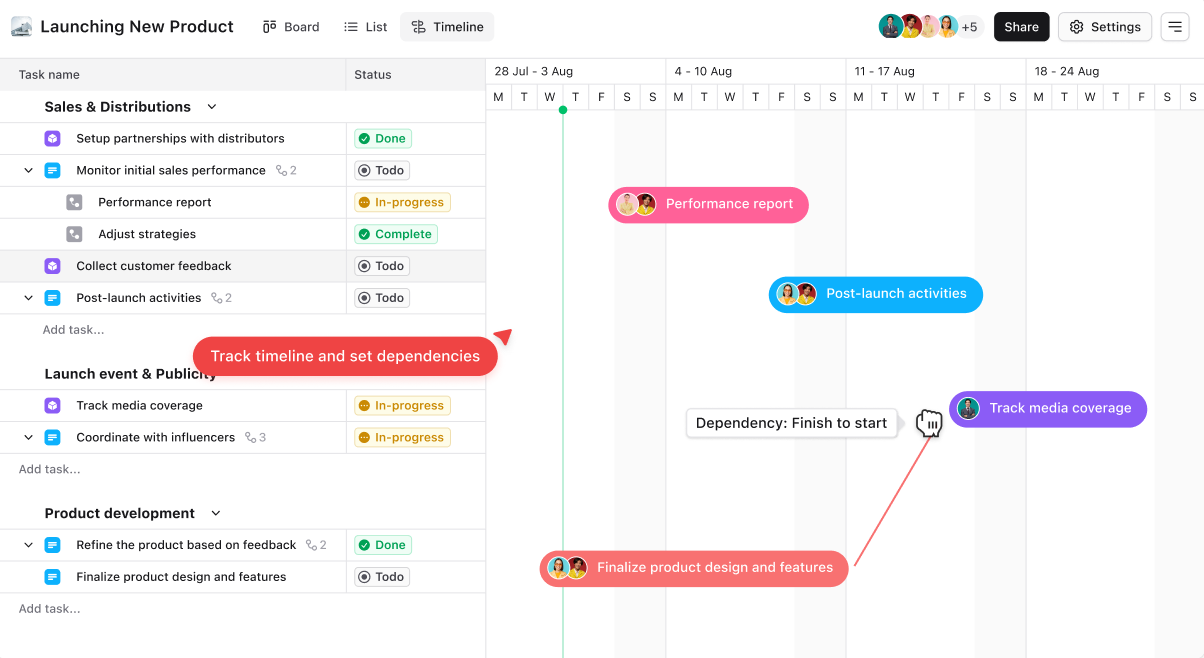
Timeline view
The Timeline View in Leanbase offers a visual representation of tasks along a timeline, helping teams plan and track schedules. It’s ideal for managing deadlines, dependencies, and project milestones, ensuring efficient time management and resource allocation.
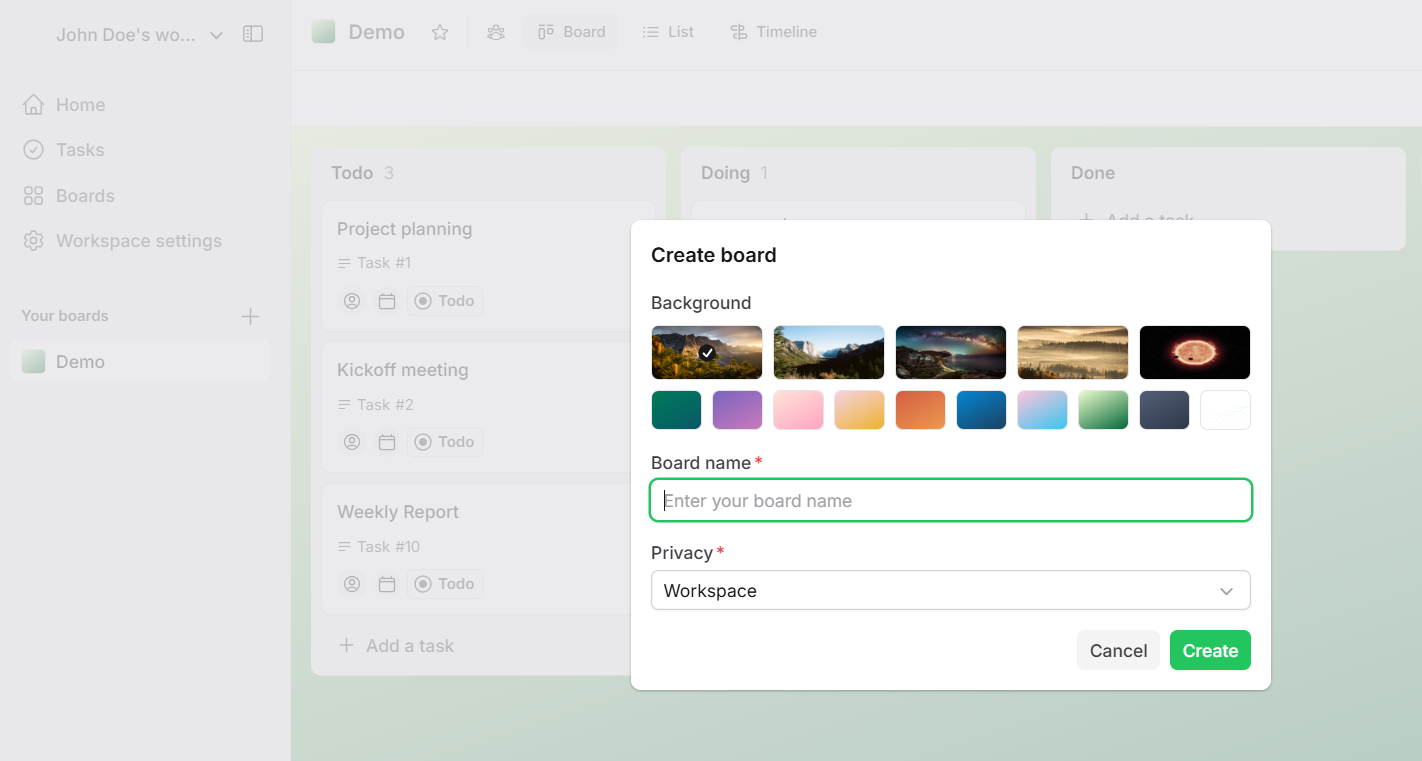
Create new board
Navigate to your workspace and click the
+button.Enter a name for your board and choose its privacy setting: Workspace (shared) or Private.
Choose a favourite board background
Click Create.
Add and customize columns to fit your project’s workflow.
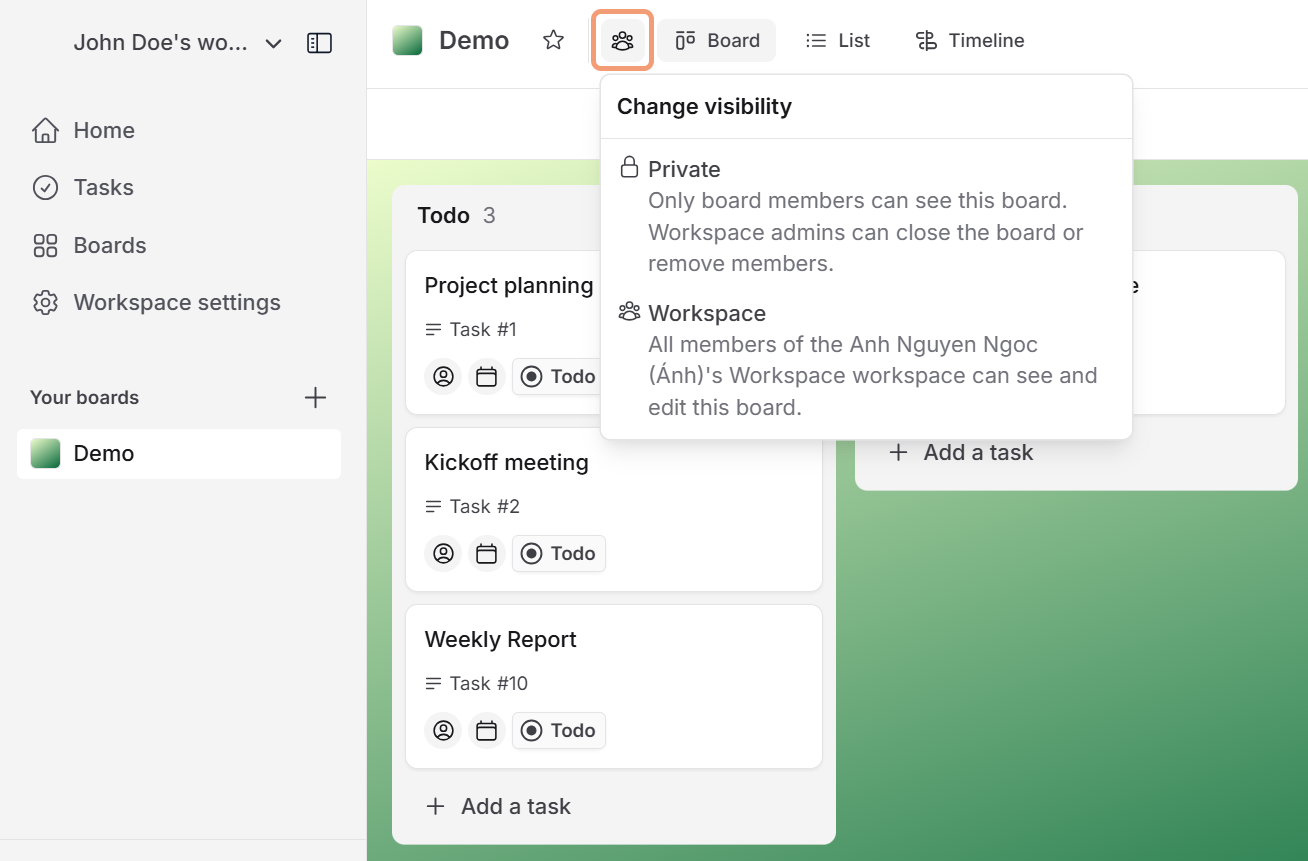
Set board privacy
On the top navigation bar, click the Privacy icon.
-
Select the privacy option:
Private: Visible only to board members. Workspace admin can close the board or remove members.
Workspace: Visible to all workspace members. All workspace member can see and edit this board.
Set roles permission for board
Open the board and click the hamburger menu in the top-right corner.
Select the Role permissions section.
Customize permissions for Admins, Members, and Guests as needed.
Click Update to apply the changes and ensure proper access control.
To add a new role, click Add Role and set up the desired permissions for that role.
