Workspaces in Leanbase are hubs for organizing projects, teams, and tasks. They streamline collaboration, assign roles, and maintain clarity across teams. This guide covers creating, managing, and optimizing workspaces for efficiency.
A workspace in Leanbase represents a container for boards, tasks, and team members. Each workspace operates independently, allowing users to customize settings, roles, and permissions as needed.
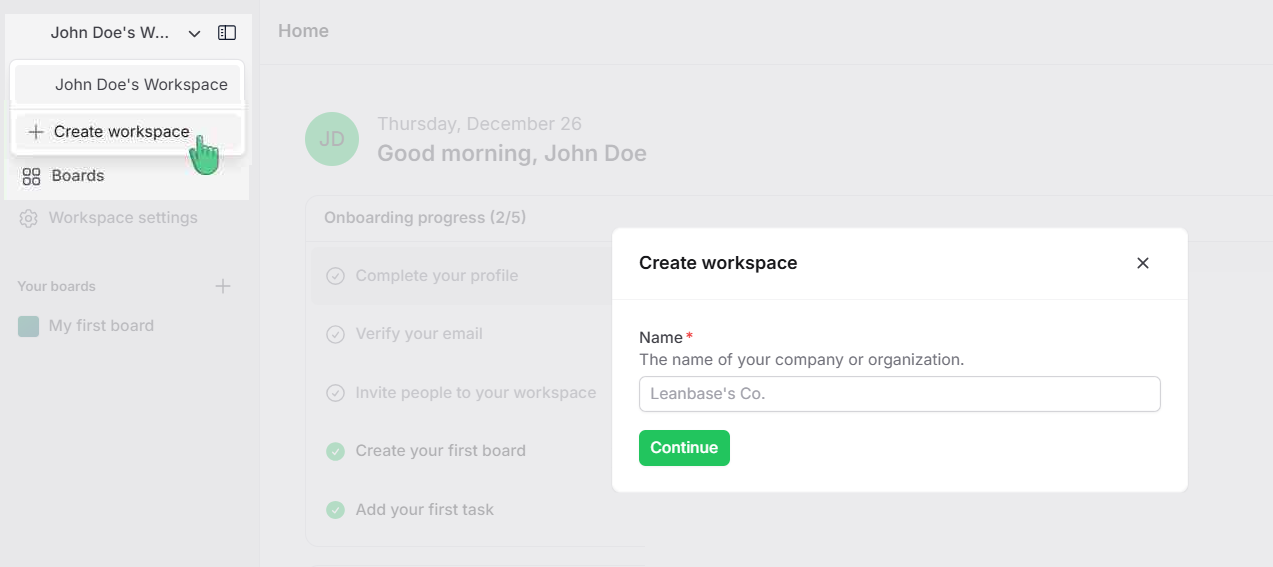
Create workspace in Leanbase
Navigate to your workspace’s name.
Click on the Create workspace button.
Enter a name for your new workspace (e.g., "Marketing Team").
Click Continue to finalize the creation.
Your new workspace is now ready to use, and you can start adding members and projects.
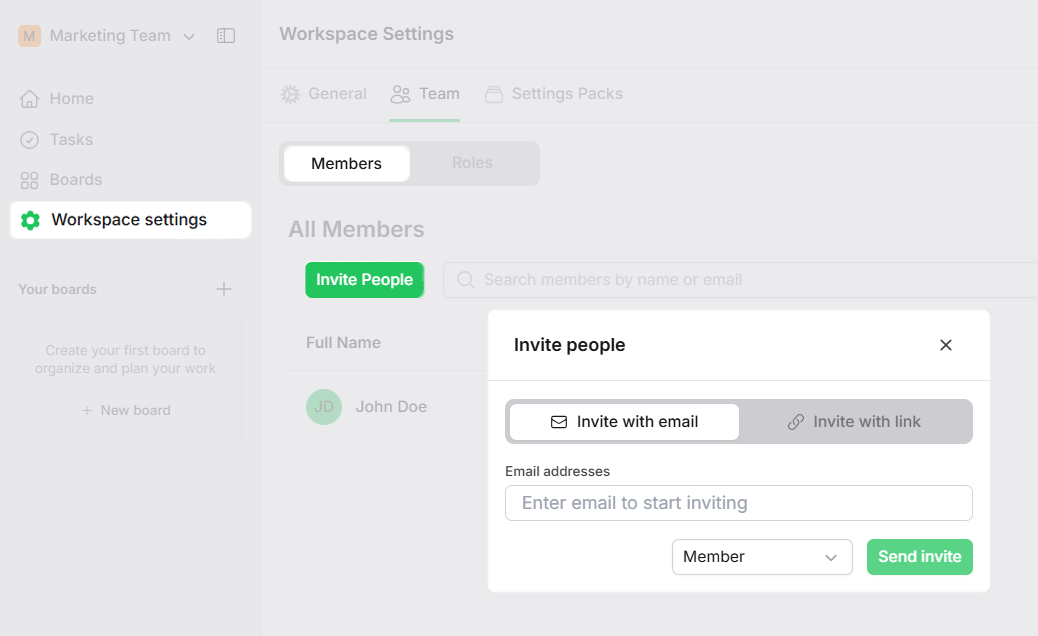
Invite people to workspace
Open the workspace you want to manage.
Click on the Workspace settings menu, navigate to the Team tab.
In the Members section, click the Invite people button.
Choose one of the following options:
Invite with email: enter the email addresses of the individuals you want to invite.
Invite with link: Click on Create Invitation Link, then Copy Link to send it to the individuals.
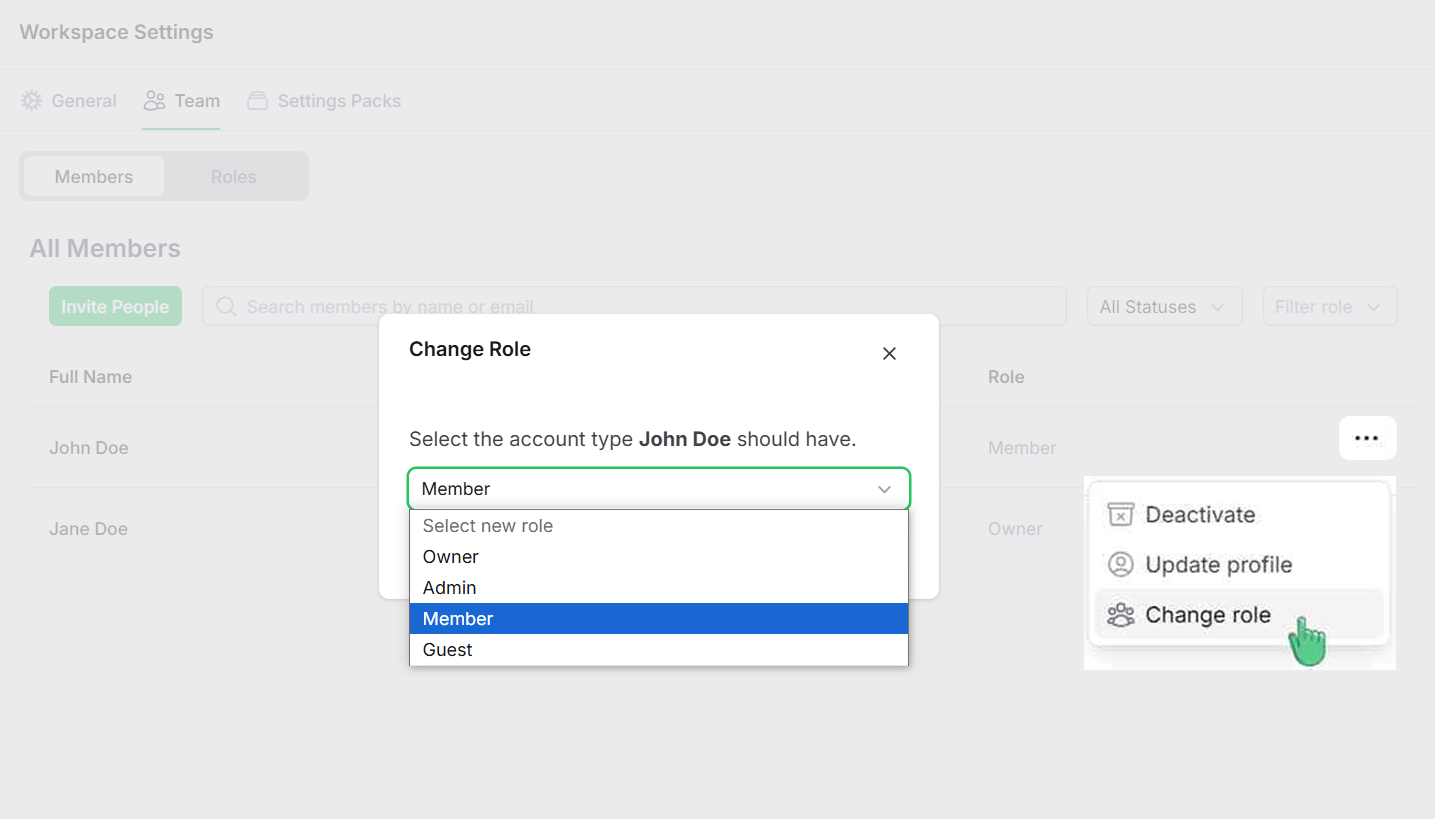
Set role in workspace
Members invited to the workspace are assigned the default role of Member.
Access the Workspace settings and navigate to the Team tab.
In the Members section, locate the member whose role you want to modify.
Click the three-dot menu next to the member’s name and select Change Role.
Choose the new role from the options: Owner, Admin, Member, or Guest.
Click Change Role to apply the changes.
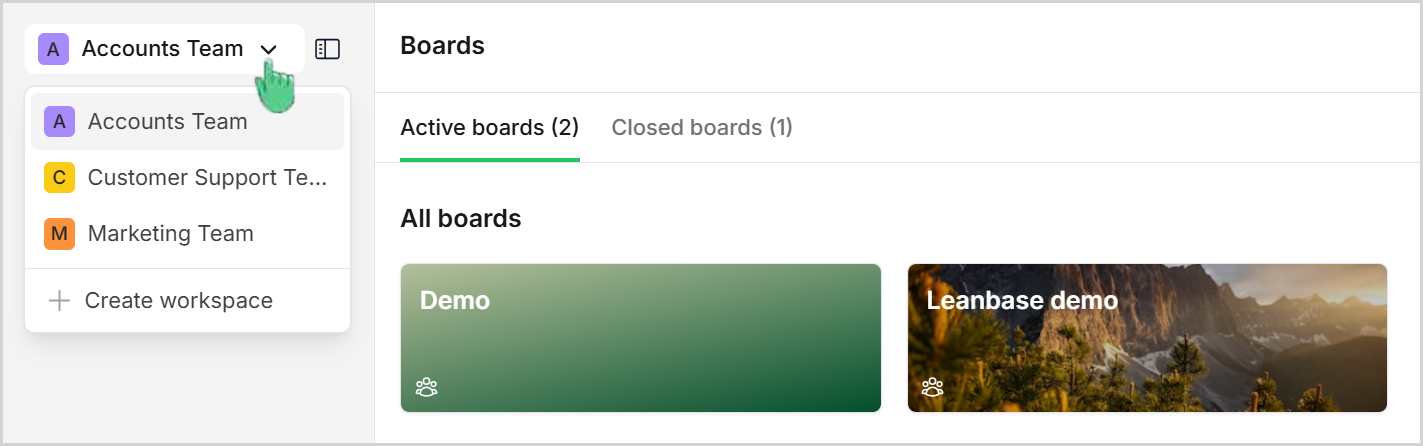
Switch workspace
Click on your workspace name in the top navigation bar.
A dropdown list of available workspaces will appear.
Select the workspace you want to switch to.
The system will redirect you to the selected workspace’s dashboard.